It's very foggy this morning with not a breeze in sight.
Just a bit over 50 degrees
It rained a few days ago, some of the seed has sprouted in the feeder. The birds have their own lawn!
Caught this little guy coming in for a morning snack. Papa Bear really needs to go fill up all those cans that are in the background!
I hope everyone has a very safe and Happy New Years celebration, we plan on staying in with snacks and a bottle of bubbly. May 2012 bring us all a better year!
My children, my grandchildren, my family and my friends cannot live like this. It is going to take Your intervention. We have went to the polls, we have called, emailed and wrote our congress and senate. We have went to rallys. Please hear our cries.....Stop this man before he completely ruins us and what is left of our country.
In Jesus name....
Amen
Matthew 18:20 says, "For where two or three are gathered in my name, there I am among them."
The boys played....
..and so did the girl
The Marine watched and laughed at everyone.
The story of the birth of Christ was read
Christmas kisses were shared
a gingerbread house was built....
....dismantled.....
..and ate
a tired Mom rests
family visits
another special Christmas shared by our family.
Merry Christmas and Happy New Year!
Christmas Carolers (Angels) came to our house and sang to our Marine! What a special treat and no easy feat. We live 25 miles from town and 4 miles back in the woods! We were absolutely thrilled. I couldn't get all the carolers (angels) in the picture. They were on both sides of our sons bed and standing outside his room.
The young lady in the red sweater at the head of the bed told us of her own Christmas Angel. My niece babysits her and her sister while her Mom works on Fridays. They were standing in line at Walmart and the young lady struck up a conversation with an elderly lady (angel) in line. After chatting a few minutes the elderly lady (angel) asked my niece if she could give the young lady some Christmas money. My niece agreed and thanked her. When the elderly lady (angel) checked out she turned and handed the young lady with my niece a one hundred dollar bill and simply walked out of the store. Needless to say the young lady asked my niece if they could shop a little longer. The young lady spent her new found wealth on Christmas presents for her family!
My friend and former employee came over a few days ago to bring us a Christmas cake and had her own Christmas Angel story. She went to the post office last Saturday to mail her granddaughters their Christmas presents and the debit machine was out of paper and it could not be used. My friend had no cash or checkbook with her. The clerk in the PO could not find paper. My friend told the clerk that was OK she would just come back Monday to mail them but the clerk told her to wait around a few minutes as he was waiting on a call from the Post Master to tell him where the paper was located. He also said if the package didn't go out that day it may not make it before Christmas. There were a couple of people in line behind her and one man (angel) asked how much was the postage and he pulled out his wallet and paid for the package, another man (angel) wanted to get in on this giving spirit and he paid the first angel half of the original postage.
May you all have a very Blessed and Merry Christmas!
GS was asked to bring cupcakes to school for his Christmas party. I found a picture of pull apart cupcakes made in the shape of a snowman. Unfortunately there were just scant directions in the comment section but daughter said she could do it.
While the cupcakes were baking she melted chocolate chips in the microwave, added black paste used to color icing and poured it on wax paper in the shape of a hat she had drawn on the opposite side of the paper. A carrot nose was free formed using melted orange chocolate. The wax paper was slipped onto a piece of cardboard and placed in the freezer for the melted chocolate to re-harden.
She next laid out the shape of the snowman with the cupcakes and put a dab of frosting on the bottom of the cupcakes to make them stick to the cake board so they would not move around.
She added powdered sugar to the ready made vanilla frosting to make it thicker.
Using a number 32 tip and pastry bag, she began in the center of the snowman going round and round.
GS sprinkle white sparkling sugar decorations over the icing to make the snowman "frosty" looking.
Oreo cookies were placed for the snowman's buttons.
After drawing an outline with black icing, green icing was then piped on for the scarf.
Mini red M&M's were placed for the scarf's polka dots.
A pink marshmallow was cut in half for the cheeks.
The orange chocolate carrot nose was placed.The left over melted chocolate from the hat was used to make the "two eyes made out of coal". The photo lying on the table above the cake is the one we copied from the web as something to kind of go by.
The hat that has hardened was sprinkled with black shiny sprinkles and placed on the snowman's head. Green icing from the scarf was used as trim for the hat. Regular size red M&M's were used for holly berries on the hat. Daughter used more of the left over red mini M&M's to form the mouth.
We were in a hurry to finish up another project so I took only one photo of the finished cake and it doesn't do it justice. Daughter and grandson did a wonderful job on the cake. I took it to school for grandson's Christmas party, Daughter later joined him. Grandson's class mates enjoyed it very much!
There were a few left over cupcakes . Grandson decorated a few, ate one and declared them good!
I saw this great idea on Phelan's Blog a week or so ago and have been chomping at the bit to make some. Pictures do not do these pieces justice and I think all the kids we made them for are going to love them.
GS and I found Indians, cowboys and soldiers at the Dollar General for $1.00 (25 pieces to the bag.) Bought a can of Aluminum spray enamel for $2.60. We cut up paper clips and some of the wire ornament hangers to stick into their little heads and it worked fine.
I used some swede leather strips to make the necklace part and I can't remember what the price was for those.
I had some wooden beads from another project and added one before I knotted the leather.
two of the warriors
and a coyboy
I don't know if I should laugh or cry for someone being so stupid....
I made a personalized notebook for my great niece using a 1inch notebook with a plastic overlay. I purchased these at Sam's Club. I think they were either a 4 pack or 6 pack...can't remember but they end up being less than $2.00 each.
I used a free program from Kodak to make the page and printed it on photo paper from my printer. She is crazy about horses and one of the pages happened to have a horse theme. I purchased a nice 5 pen package of roller writers from Office Depot for less than $4.00.
Inside the notebook I added a writing pad, some notebook paper and some page protectors.
Last year, after Christmas, the Dollar General near my home put all of their Christmas items on sale. I checked the store every few days to see how low the prices were marked for that day. I eventually purchased these items for 10 cents each. I have the little Christmas houses and baskets to put goodies in and also the bakery bags that come 6 to a pack. I probably bought about 30 of the houses and baskets, brought them home set them down in a clean plastic bag and boxed them up. This coming week I will be putting them to good use.
I have been baking up a storm. Fresh loaves of bread, coconut pound cakes (not shown) and coconut cookies. I am using a lot of coconut as that is also an item I got on sale at the Dollar General last year and put it in the freezer. The first few bags I got for 30 cents each. A few days later I had my daughter check the stores near her. They were an unbelievable 10 cents a bag. Each bag has 4 cups of flaked coconut! Boy did I score on that one.
A dozen cookies will fit perfectly in one of the little houses and the little Christmas baskets. The neighborhood kids, bus drivers, teachers, mail lady etc will get one of these treats. I'll also put a couple into the Tote Bags I am making up for family and friends.
This is a quick and easy gift to make. It takes about 15 minutes to zip one out and who doesn't save all those little plastic bags from the store?
We use them to line our small waste baskets in the bathrooms and office, put them in suitcases for our dirty laundry on trips. My niece uses them for poop holders when she walks her dog. You get the idea. Hang them from a doorknob or hang on the wall with a small nail or tack.
Supplies needed for 1 holder:
- Sewing Machine and thread
- scissors
- pencil
- ruler
- 1 dish towel (I get mine for $1.00 at Dollar General)
- approximately 16 inches of 1/4 inch elastic
- approximately 28 inches of 3/8 inch ribbon or size of your choice.
Lay your towel out flat and find where you would like the bottom and top trim to be. I measure from the edge of the towel to just where the print starts.
Turn your towel over and draw a line with a pencil across the towel using the measurement you just took. Repeat for the other end of towel.
Fold your towel in half longways and cut 2 pieces of elastic just about 1/4 to 1/2 inch longer than the folded towel. Don't stretch the elastic at this point.
Measure your elastic and mark the center by drawing a line. Mark both pieces of elastic.
Find the center of the line you drew on the towel and mark . Repeat for the other end of towel.
Place your elastic even with the line leaving a small amount hanging over the edge.
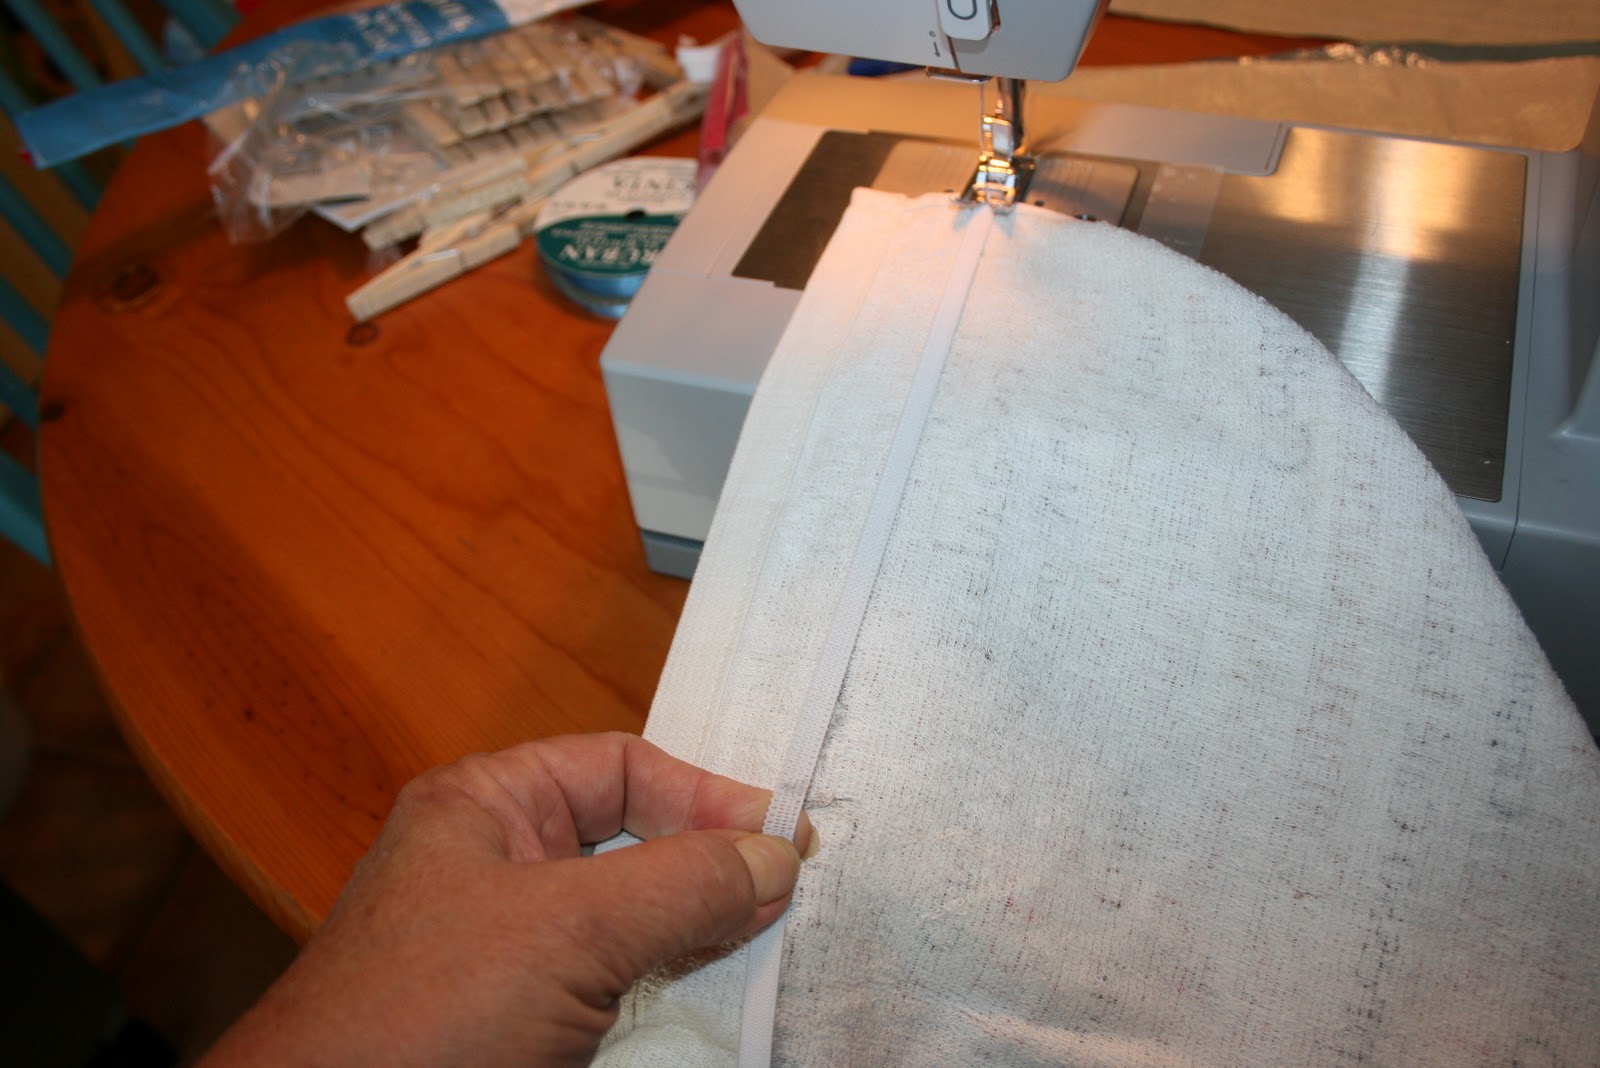
Place under pressure foot of sewing machine and using a zig-zag stitch make a few stitches forward and backwards to hold the elastic secure.
Now stretch your elastic until both center lines meet while keeping elastic edge with your pencil line. Sew all the way across and end with a back stitch to secure. Repeat on other edge of towel.
Fold towel with right sides together and match edges. Pin edges if desired. I have not found a need to do so.
Using a straight stitch sew long edges together with about a 3/8 to 5/8 inch seam. Use a back stitch on both top and bottom to secure your seam.
Turn your tube inside out. It should now look like this.
Cut a length of ribbon 8 inches long. Determine which end you want to be the top (with dish towels one half is going to be upside down) My preference is to put the right side towards the bottom.
Make the ribbon into a loop and place it on the inside on top of your seam and about 3/8's from the edge and sew it a couple of times back and forth to hold the ribbon.
Your loop should look like this on the inside of the towel.
Measure another piece of ribbon about 20 inches and mark the center.
On the front side of your towel just below the elastic and opposite the loop sew the ribbon. Make sure the backside of the towel and loop are out of the way.
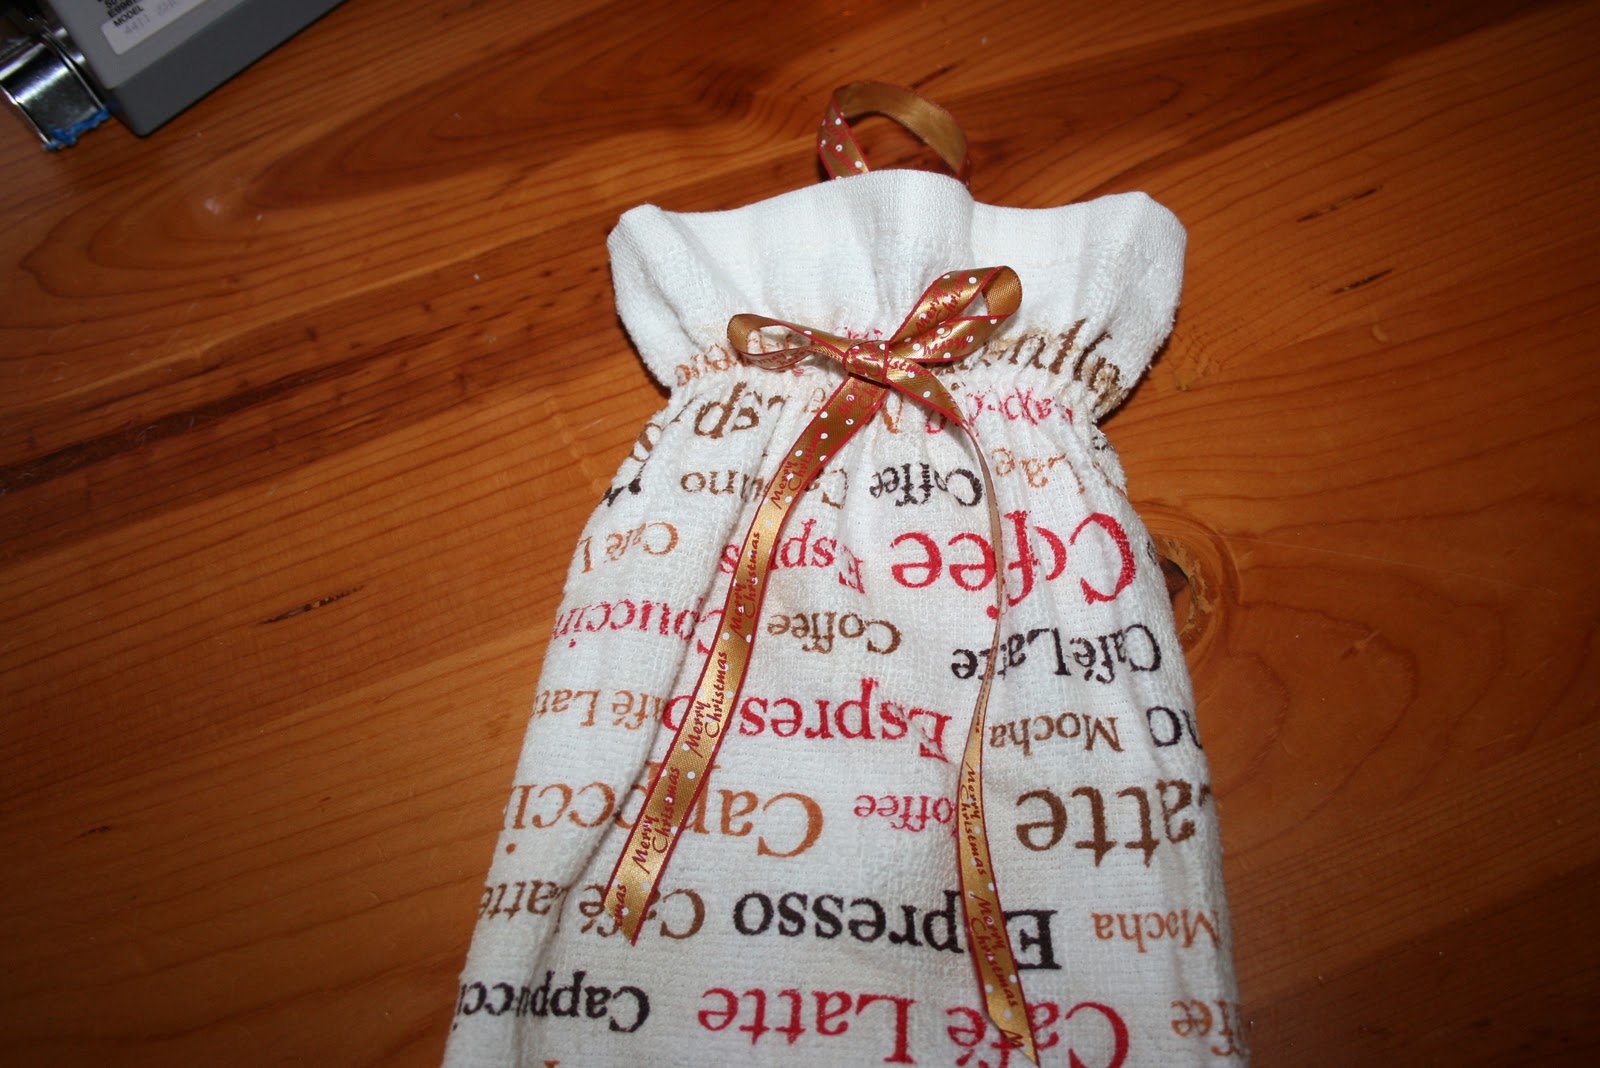
Tie the ribbon into a pretty bow and trim the ends if needed. You could make the bow and then sew it on with a needle and thread but this method is just as easy for me.
Before you give it as a gift you may want to stuff a few plastic bags into it. Some gift recipients may not know what that strange looking tube is for!
Another finished project!